How to Use Excel Solver for Linear Programming (with Easy Steps)
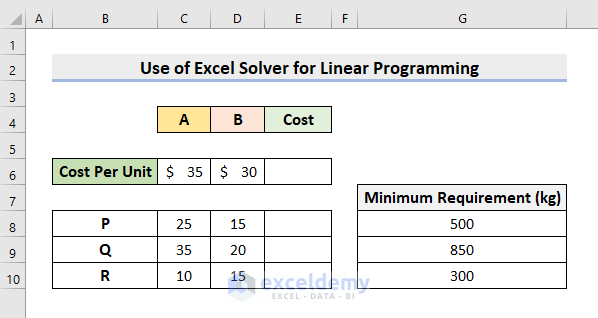
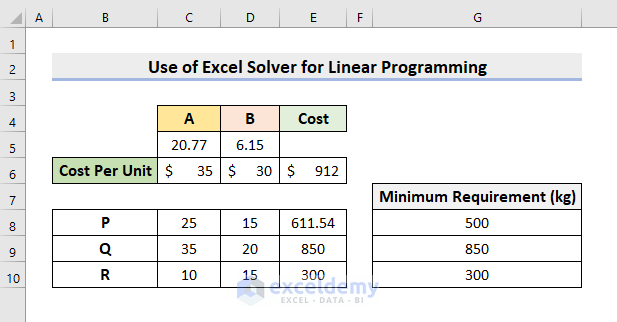
Linear Programming is an important aspect of Statistics and Applied Mathematics. You can perform predictive analysis with prevalent data variables. It helps us in the optimization of the resources. We must have some constraints and an objective function for that purpose. The Excel Solver can quickly figure out the solutions to Linear Programming problems by solving equations in Excel. We’ll use the following business problem as an example. A manufacturer has two kinds of products, ‘A’ and ‘B’. A single unit of product A requires three raw materials, P 25 kg, Q 35 kg, and R 10 kg. Similarly, B requires P 15 kg, Q 20 kg, and R 15 kg. The manufacturer needs a minimum of P 500 kg, Q 850 kg, and R 300 kg. If A costs $35 per unit and B costs $30 per unit, how many units of each product should the manufacturer blend to meet the minimum raw material requirements at a low cost as possible, and what is the price?
STEP 1 – Enabling the Solver Tool in Excel
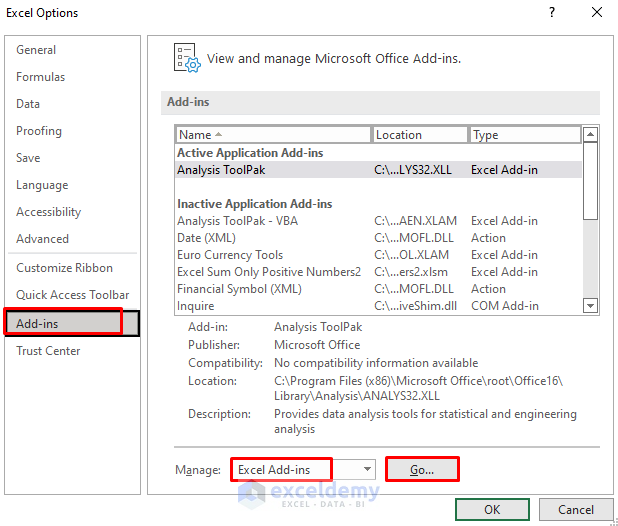
- The Add-ins dialog box will pop out.
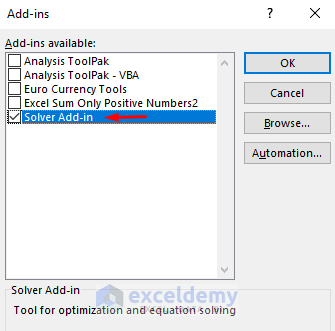
- Check the box for Solver Add-in.
- Press OK.
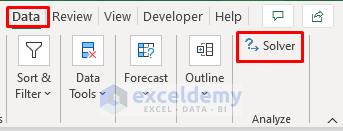
- You’ll see the Solver command in the Analyze section under the Data tab.
STEP 2 – Inserting Constraints
We’ll input the Constraints and the Objective Function in the Excel worksheet. According to the problem, we’ll blend x units of product A and y units of B. The total cost will be $35x + $30y. This is our objective function, and we want to minimize this cost. At the same time, we have to meet the requirements. 25x + 15y >= 500, 35x + 20y >= 850, 10x+15y >= 300, x >= 0 and y >= 0 are our constraints.
- Type in the per-unit costs of A and B.
- Input the materials under the respective products.
- Insert the minimum required amounts.
STEP 3 – Creating the Excel Formula
=($C$5*C6)+($D$5*D6)
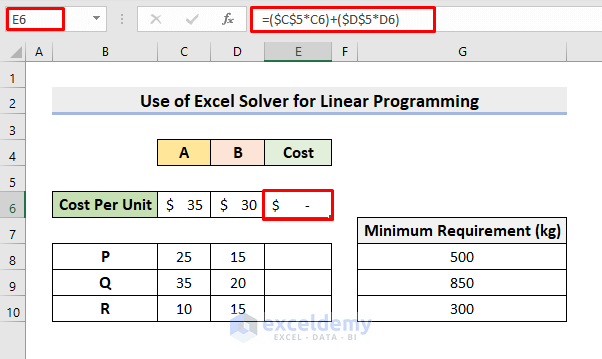
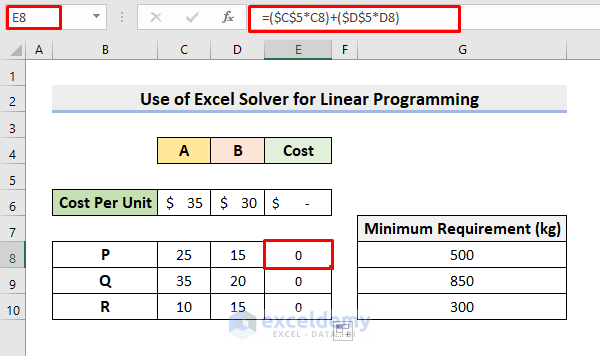
=($C$5*C8)+($D$5*D8)
- Press Enter to return the values.
- Use the AutoFill tool to complete the rest.
- The results are 0 as C5 and D5 are empty.
STEP 4 – Using the Excel Solver to Solve with Linear Programming
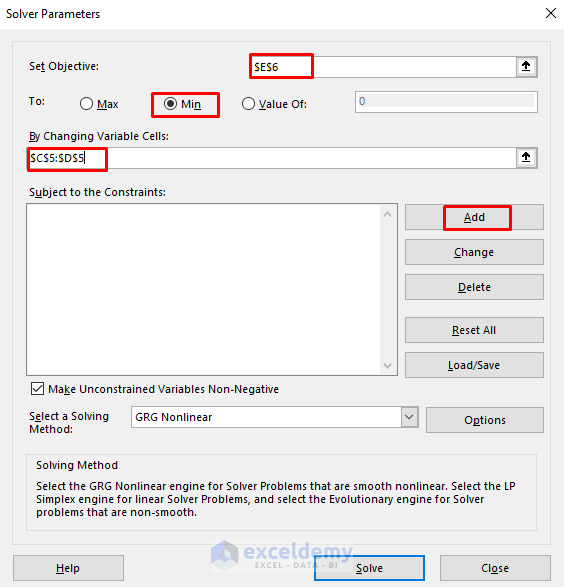
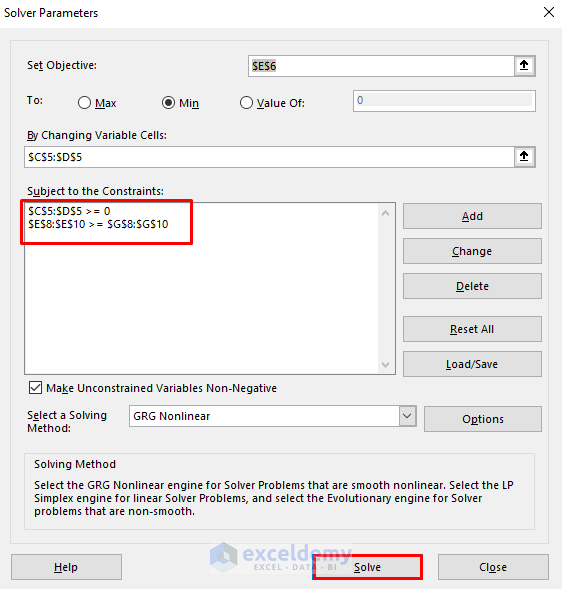
- Select the Solver program under the Data tab.
- The Solver Parameters dialog box will emerge.
- Choose cell E6 in the Set Objective box.
- Check the circle for Min.
- Select the range C5:D5 as variable cells.
- Press Add to add the constraints.
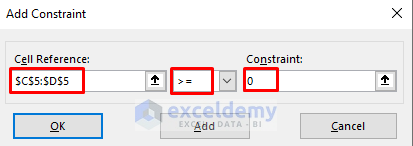
- The Add Constraint dialog box will appear.
- Choose the range C5:D5 and click the >= (greater than or equal to) symbol from the drop-down.
- Type 0.
- Press Add .
- Choose the range E8:E10 for minimum requirement constraints.
- Click the >= symbol from the drop-down.
- Select the range G8:G10 in the Constraint field.
- Press OK.
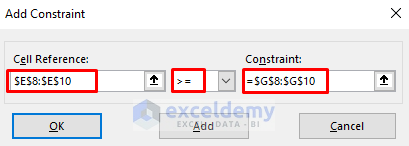
- Hence, you’ll see the desired constraints.
- Press Solve.
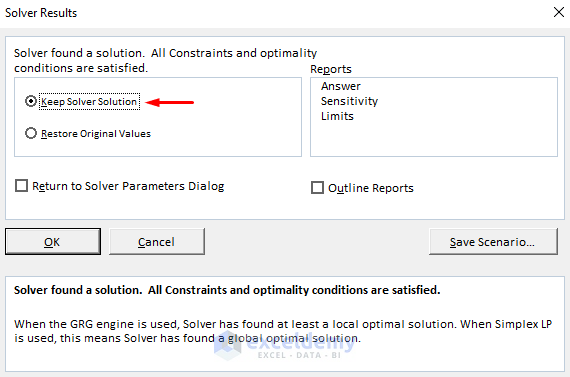
- You’ll get a dialog box about the solved results.
- Check Keep Solver Solution.
- Press OK.
- This’ll return the precise results in the appointed cells.
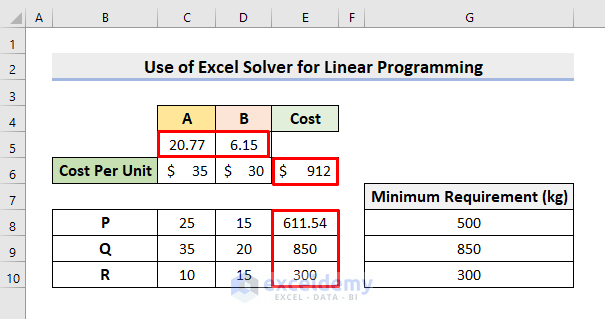
Final Output
Download the Practice Workbook
Use of Excel Solver.xlsx
Related Articles
- How to Use Excel Solver to Rate Sports Team
- How to Use Excel Solver to Determine Which Projects Should Be Undertaken?
- Solving Sequencing Problems Using Excel Solver Solution
- Solving Transportation or Distribution Problems Using Excel Solver
- How to Assign Work Using Evolutionary Solver in Excel
- Resource Allocation in Excel
- Solving Equations in Excel


